Raise your hand if you have noticed that there are certain exercises that are uncomfortable, too difficult, or maybe even painful for you to do? Feeling the burn is totally normal, but feeling actual pain is not ok! You may feel like you may need to change things up to fit your needs.
In my 10 years of training people just like you in the fitness industry, I know just how difficult it can be to find the motivation or even the time to get a good workout in sometimes! So when something starts to hurt or is too difficult, it can potentially frustrate you, throw you off your fitness course, and leave you injured!
I know this all too well myself! I hurt my knee several years ago, and ever since then I have had to modify the way I do cardio and certain exercises to compensate for my injury. Just know that modifying exercises and routines is not lessening the effectiveness, it is simply changing it up so your body can safely do them!
But wait, there's some good news! I've compiled 10 of the most common exercise moves you commonly see in a fitness routine and I've explained how to effectively adjust them to fit your needs!
Let's get started!
Push-Ups
A push-up, executed properly, will work your pectoral muscles, deltoids, triceps, biceps, and even your core! They are a fantastic strength move to add into any workout because they help you hit so many muscle groups at once.
If you have shoulder pain or injuries, lower back problems, or are just having a difficult time doing a push-up; then you should try modifying them to fit your needs!
There's nothing wrong with a little modification, as it helps you still accomplish them without causing yourself further injury.
Traditional Push-Up
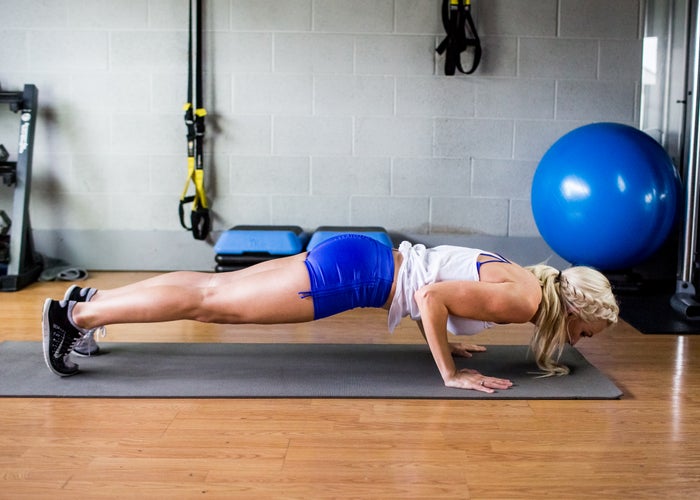
When you perform a traditional push-up, you should start in a plank position with your hands under your shoulders, elbows pointed outwards. Lower your body to the ground, and be sure to touch your chest to the ground if you can. Also remember to keep your eyes focused forward to alleviate strain on your neck.
Modified Push-Up
In order to modify a push-up, you can start by holding a plank position on your knees. Doing this helps to protect your shoulders and lower back. You can do these on the ground, on a bench, or even a sturdy coffee table at home!
You can also modify push-ups by standing at an angle against a wall, if being on your knees is too hard or painful. Stand about a foot away facing the wall, placing your hands shoulder width apart on the wall in front of you. Lean all of you body weight onto your hands and push in towards the wall, and then push yourself back up.
Be sure to still bring your chest all the way to the ground, or the wall, to get the full range of motion and effectiveness from the move.
Planks
Planks are a great exercise to help build up your core strength and stability. I mean, who doesn't want stronger, toned abs? Am I right?
Planks also help you develop better posture, which can help alleviate back pain.
Traditional Plank
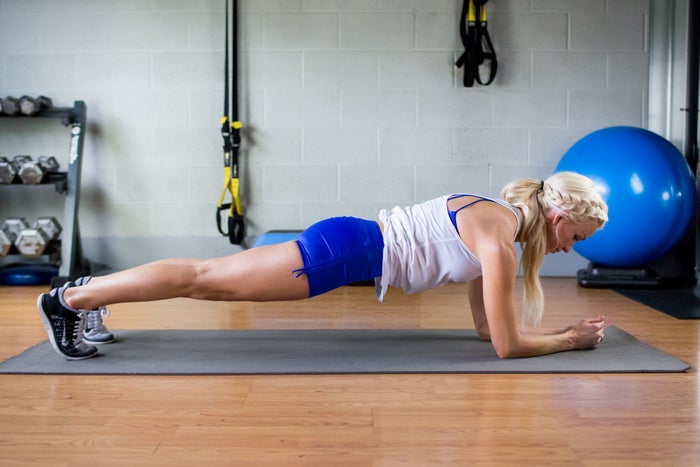
There are several common mistakes that people tend to make when it comes to holding a plank, which can largely diminish the effectiveness of the move. Just a few small tweaks and it becomes such a powerhouse ab builder, and still fit your needs physically!
Come down on your elbows in the plank position, keeping your elbows directly under your shoulders to keep a solid base and engage the required abdominal muscles. Also be sure to keep your neck neutral to avoid unnecessary strain by looking down and slightly ahead of your hands.
Keep your muscles tight and engaged as you hold it, and keep your hips down and in line with your spine. If you let your hips drift up, it will become a completely different move! So keep your hips tucked under, and really contract and engage your abdominals to hold it tight.
Modified Planks
Planks, like push-ups, can tend to cause stress or pain in the shoulders and lower back. A good way to adjust is to move to your knees. You can also hold the knee plank on a bench or sturdy coffee table as well to add a bit more of a challenge.
Lunges
Lunges are fantastic because of their ability to work three of the most common problem areas: your hamstrings, quads, and most importantly your booty! Talk about a trifecta!
Traditional Lunge
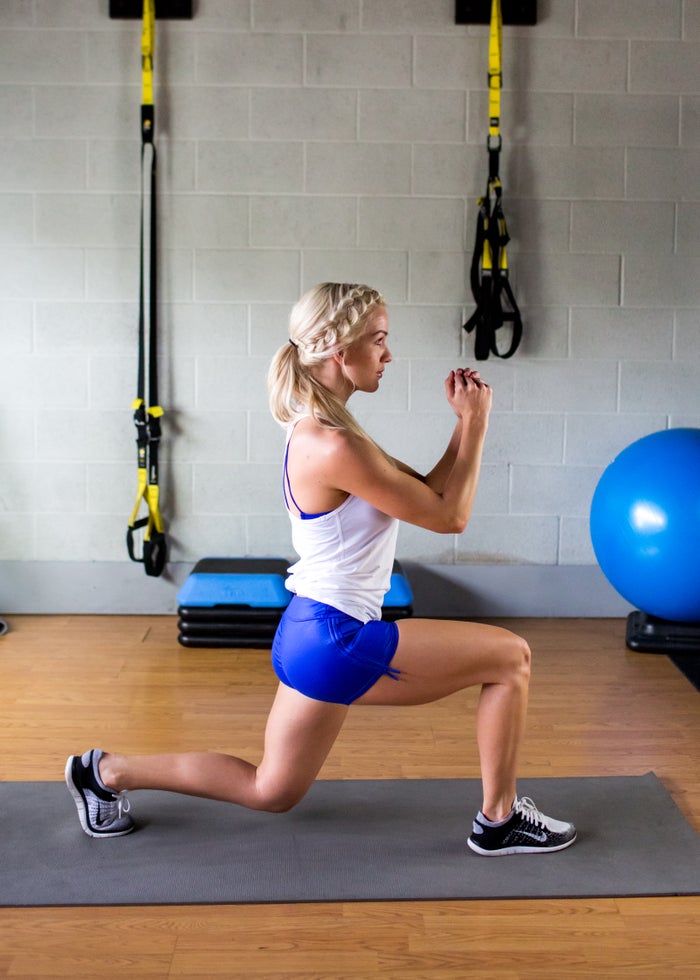
When performing a lunge, there are a few simple rules to follow to maximize the move, and also avoid injury.
Remember to keep your upper body straight, pull your shoulders back, and keep your chin up. Also don't forget to engage your core, because it's an added bonus to build up those abs!
Start with your feet shoulder-width apart, and then step one leg forward. The back leg should be engaged on the ball of the foot, while the front leg should bend down to a 90 degree angle towards the floor. Major key here is to not let the front knee go forward over the toes, keep it directly above the ankle.
You can do variations of a lunge, including stepping forward or backward into them, stepping up onto a bench, or stepping sideways into side-lunges.
Modified Lunge
While lunges are an amazing way to tone your legs and glutes, they are unfortunately not very knee friendly! So be cautious if you have weak knees or injuries, and read on to learn how to modify them!
The best way to modify to protect your knees is to do a stationary lunge. Removing the added movements will help lessen the stress on your joints.
Also, only using your bodyweight will help as well! As you gradually build up strength you can try adding in hand weights, or even cans of food if you're at home! Your knees will thank you!
Squats
When it comes to toning your legs, the truth is squats are totally where it's at! They are such a staple fitness movement, because they build up your booty and strengthen your legs! Not to mention they also effectively work your core as well!
With that said, a sloppy squat never helped anyone! So read along below to learn how to properly execute a squat.
Traditional Squat
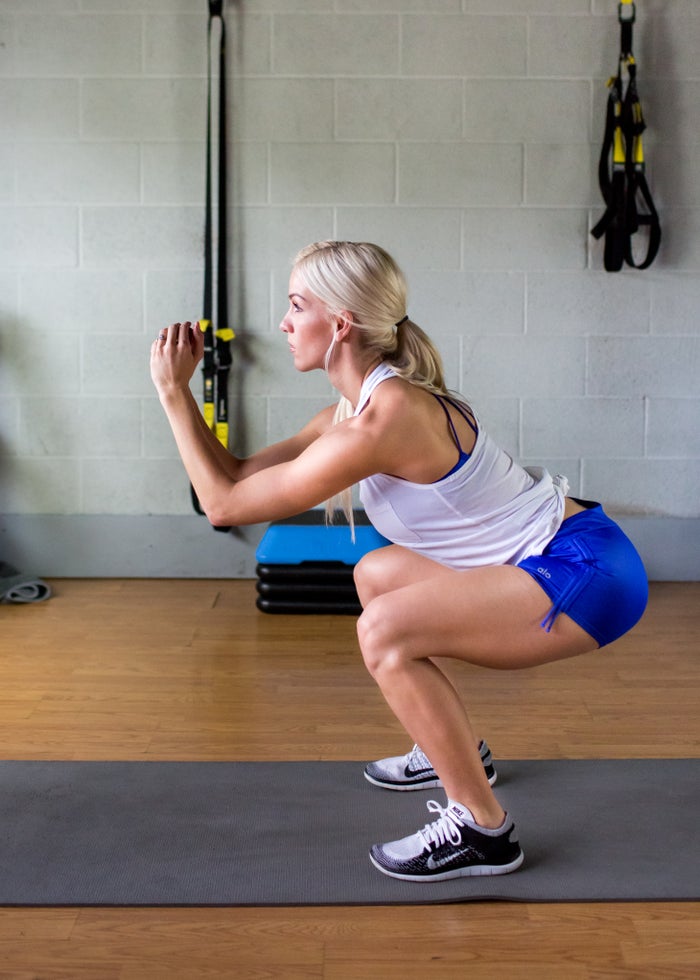
There are several variations on how to stand for a squat, including legs hip-width apart, shoulder-width apart, and wide apart with toes and knees pointed outward. No matter how your feet are placed, the basic principles apply to all.
Your weight should be completely in your heels, so that at any given time you can lift your toes up and wiggle them and not fall over. This helps protect your knees!
As you hinge at the waist and bend your knees to a 90 degree angle, dip towards the ground. It is so important that you do not let your knees go forward over your toes, so make sure to keep them in line with your ankles. The motion of doing a squat should be similar to sitting back onto a chair, so remember to push your booty back!
Modified Squat
Your lower back may experience some discomfort while performing a squat. Squats also may not be your knees' best friend! So, if you have any knee or back pain it's best to modify to help solve the problem and best fit your needs!
The first step in modification is to lose any weight you may have been using with the squat. So ditch the bar or the hand weights and just use your bodyweight. It will still be an effective movement, and will allow your body to gradually build up strength to add more weight!
You can also modify by not squatting down further than feels comfortable to you and your joints. If you go too low your knees and lower back may strain to the point of injury to bring you back up! So listen to your body, and don't let "how low can you go" be your motto until you can handle it!
Also try grabbing a stability ball and place against a wall and your lower back. You can squat leaning against the ball, which will keep the pressure off your knees.
Burpees
Now I know many of you share the love/hate relationship I have with burpees. They are a necessary evil in the fitness world! We all just love to hate them, yet they are so effective for so many reasons!
Doing a set of burpees will work your core, arms, shoulders, chest, quads, glutes, and hamstrings! Not to mention it's a great way to get your heart pumping!
Traditional Burpee
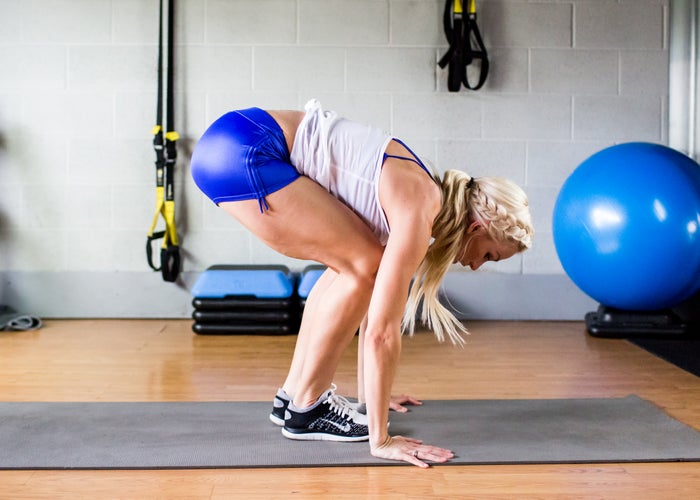
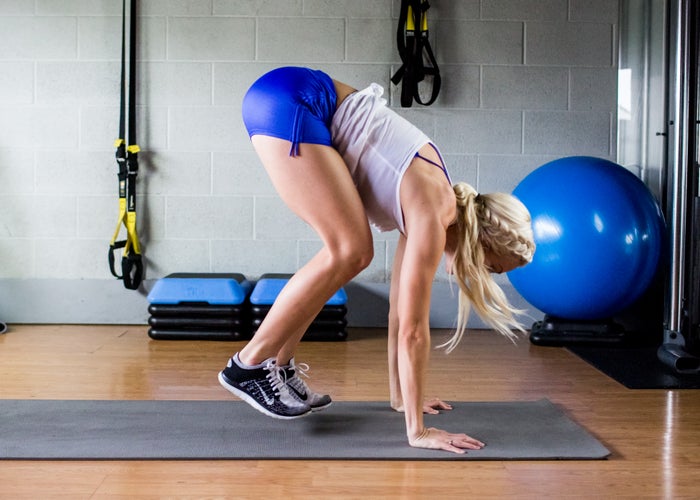
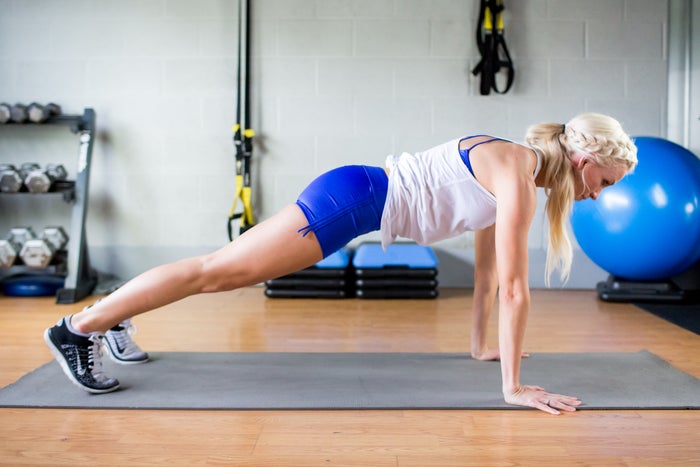
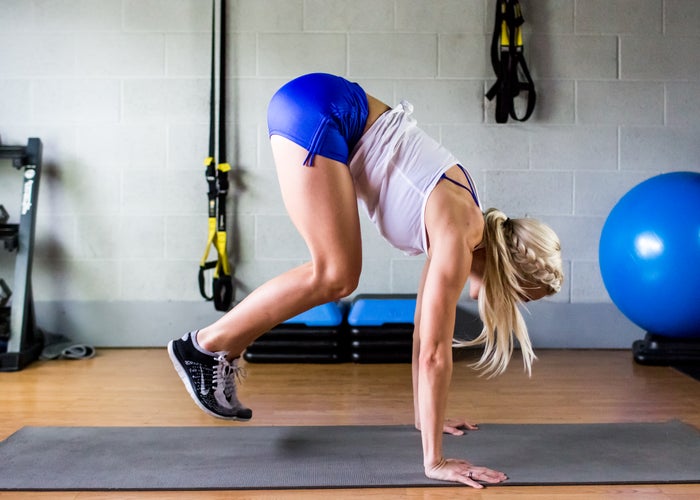
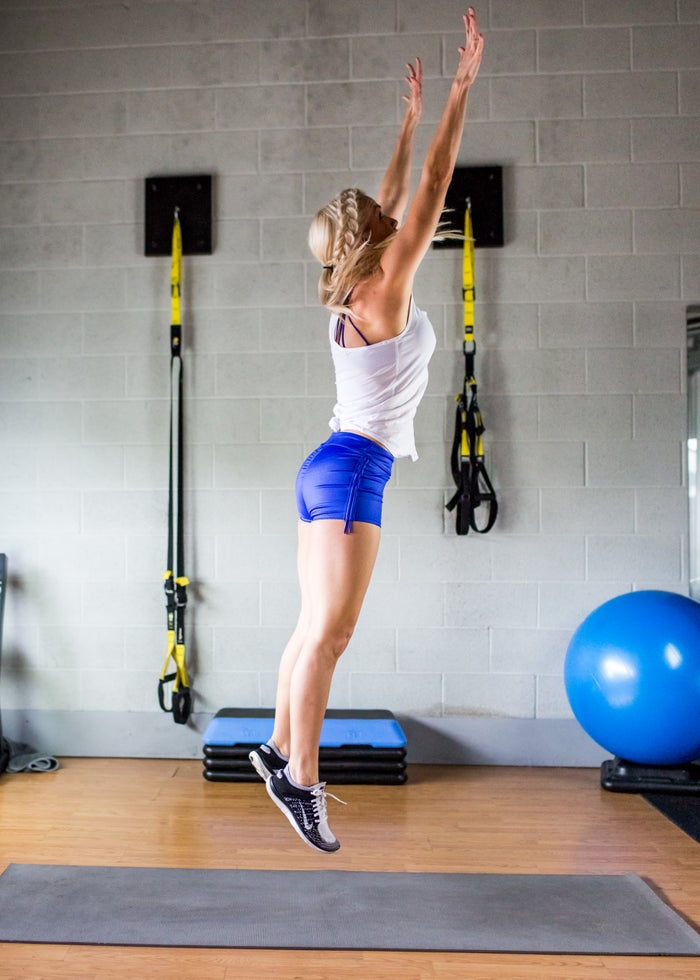
There are many variations of a burpee where you can add push-ups and tuck-jumps into the mix, but I will explain a simple burpee first for reference.
A basic burpee has four different moves that flow together into one. You start in a standing position, and then squat down with your hands pressed into the floor. From there you jump your legs back into a plank position. From the plank you jump back to the squat, and then stand again.
To spice it up you can add a push-up after the plank, or even a tricep push-up. Also, when you come up to the standing position from the squat you can jump up instead and do a tuck-jump. There are so many ways to make them different, and dare I say, more fun!
Modified Burpee
Just like I mentioned above about adding moves into your burpees, you can also modify them in similar ways to fit your needs.
If you are unable to fully squat to the floor, and then move back to a plank, squat in front of a bench and place your hands on the bench to stabilize yourself as you go back into the plank.
Also, if you are unable to jump your legs back into the plank you can simply step each foot back into it. Modifying burpees will not subtract any of the exercise benefits from the movement!
Box Jumps
A box jump, when done correctly, can be an essential move in your fitness routines. It will work your core, glutes, quads, and also improve your coordination! Also, it's a great way to get that blood pumping!
Traditional Box Jump
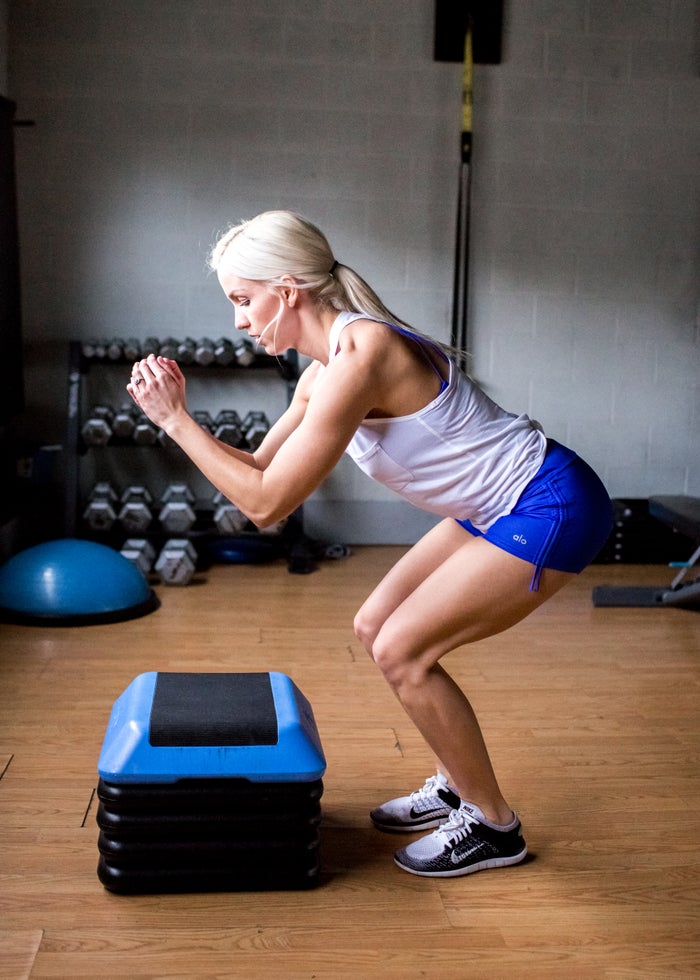
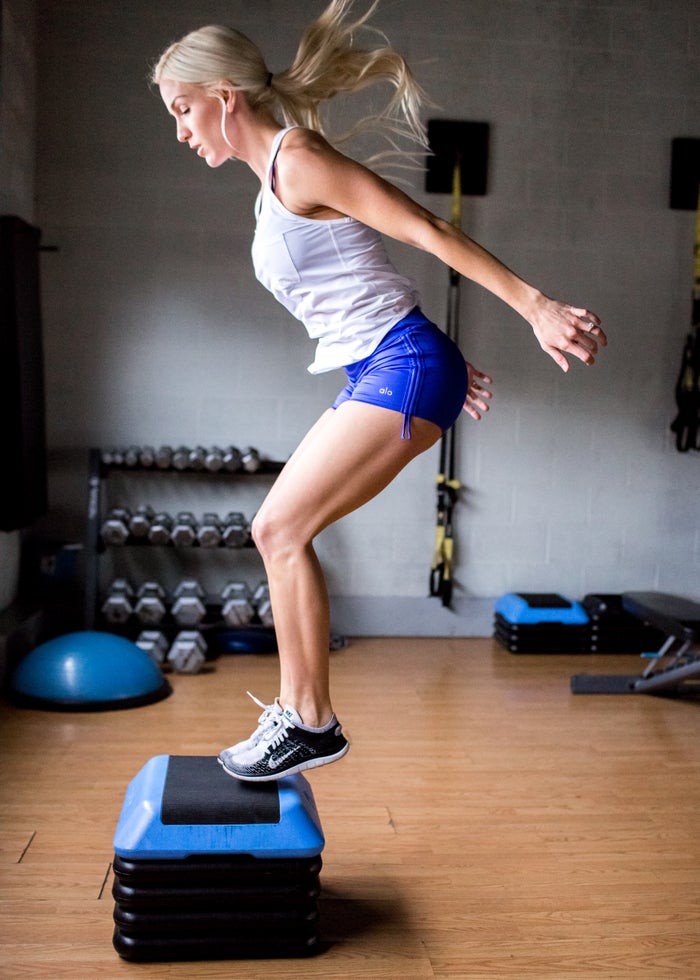
So to set up your box jump, it is a typical rule-of-thumb to stand with your toes against the box (or bench) you are going to jump onto, and then take one huge step backwards. Ideally you should be about one foot or two feet from where you’re going to jump so you won't trip up on the edge or jam your fingers into the box (ouch!)
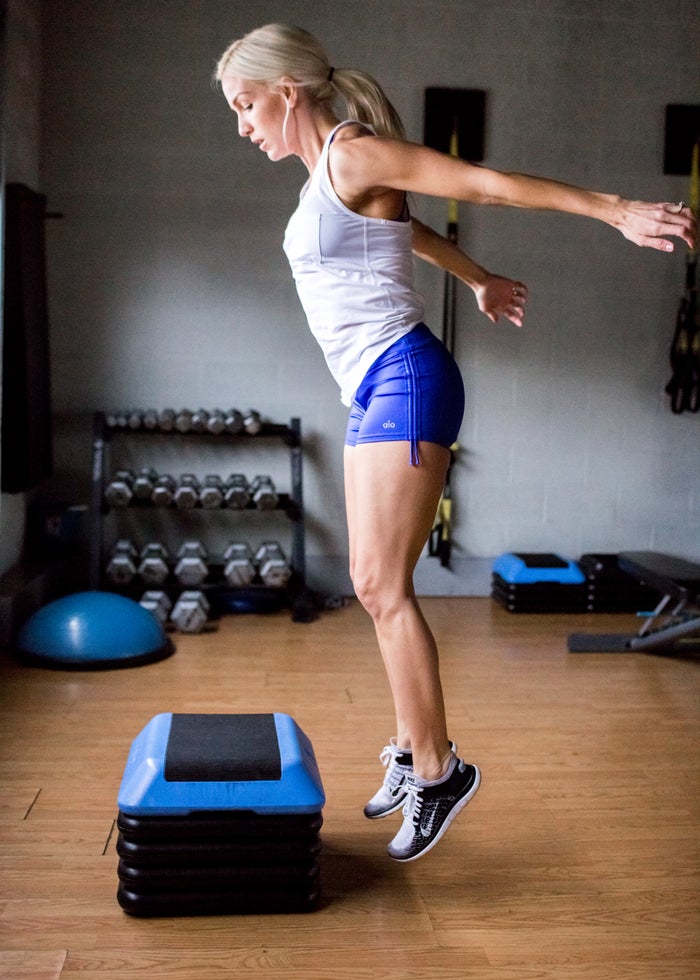
To begin you should squat down in place and then jump up and forward. If you can, try to jump as if the surface you are aiming for is two inches higher than it is, that way you can give yourself some more time to adjust and land
When you do make contact, try to land as softly as possible, kind of like a ninja. Not just to feel cool for landing like a ninja, but because it will cause less impact stress on your joints.
I do not recommend jumping back off of the box, but instead step off one foot at a time. This helps avoid injuries and causing even more stress on your joints.
Modified Box Jump
If you are new to box jumps, then you can start by jumping on the ground and working your way up to bench, and then finally a box. Begin with a bench no higher than your knees.
You can also modify by doing lunge jumps, where you hold a lunge position and then jump and switch your legs in the air. Also try tuck jumps, where you jump in place, tucking your knees up and into your chest.
If jumping just doesn't do your body any good, specifically your joints, then you can modify by not jumping at all. Instead, you can step-up onto the bench or box. Your glutes and legs will still feel the burn, and you'll have to engage your core to pull you up.
Another way to avoid jumping, you can do what is called a "negative jump". This is done by squatting down, and then thrusting your body back up into the standing position, as if you are going to jump but your feet never leave the ground. A perfect modification to mimic jumping with your muscle, to build up their strength to eventually jump!
High-Knees
High-knees are a great staple in a fitness routine, as they get your heart rate up for some good cardio.
An added bonus is they are easy to add into a home workout routine if you can’t get to a gym or outside for some cardio! They can cause minimal impact noise too, incase you live above anyone in an apartment, because we all know how annoying noisy neighbors can be, and we don't want to be 'that'neighbor! :)
Traditional High-Knees
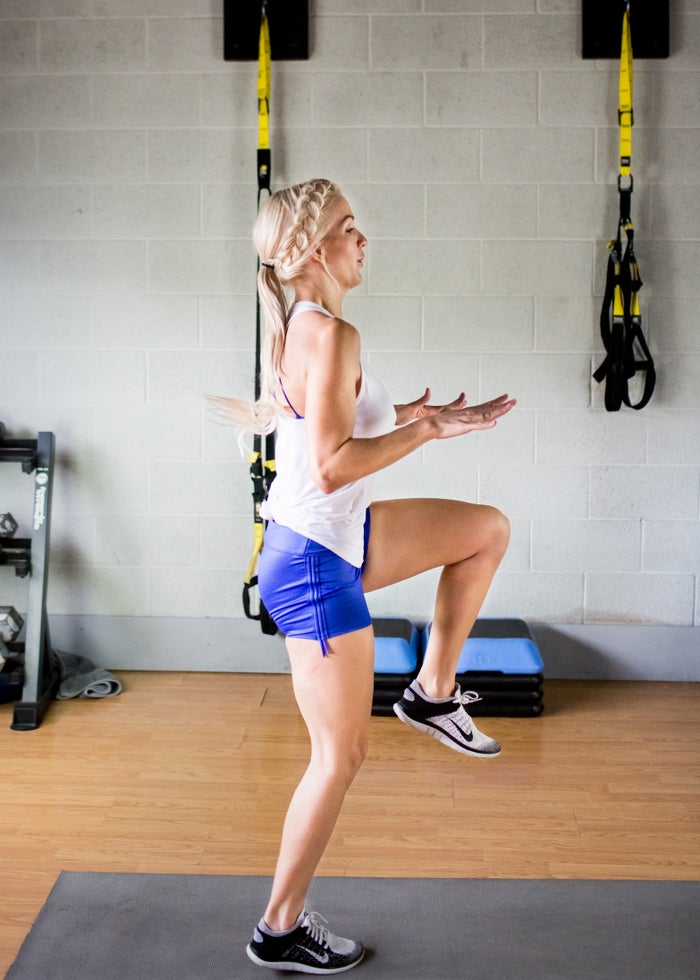
To begin, stand with your legs hip-width apart. Start running in place, but each time you bring a leg up, drive it up high towards your chest.
Modified High-Knees
Doing high-knees can cause some discomfort on your knees and even your hips. You can modify by doing them at a slow, controlled pace.
Also, a good way to protect your joints is to simply march in place instead.
Jumping Jacks
What workout isn’t complete without some good old fashioned jumping jacks? Who’s with me?
Doing jacks helps promote your cardio, and also as an added bonus will boost your metabolism! The movements also help strengthen your joints and improves oxygen circulation throughout your body.
Traditional Jumping Jacks
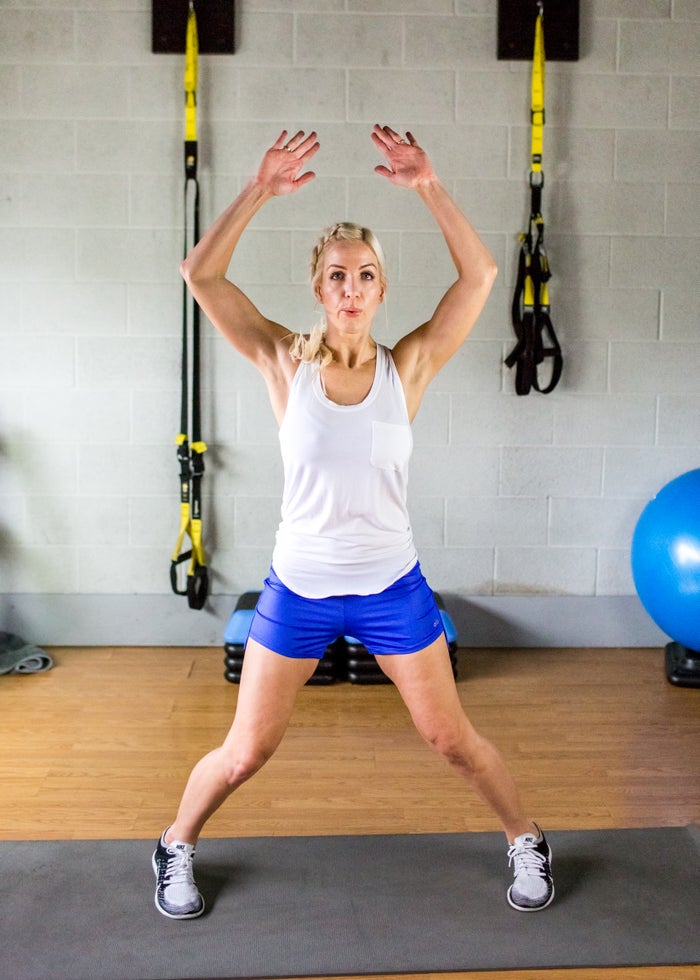
The movement of a jumping jack is fairly simple, and we all like simple! You begin standing with your legs together and your arms at your sides. Jump your legs out a little wider than shoulder-width apart, and simultaneously throw your arms out and up above your head. Jump your legs back together and drop your arms back to your side. Repeat!
Challenge yourself by adding some more components to your jacks.
You can do squat jacks by squatting down and throwing your arms up as you squat, and then bringing them to your side as you jump up to a standing position.
Also, you can do what is called a star jump. Do one traditional jumping jack, and then follow it with the star jump; you do so by doing a jack but jumping off of the ground and throwing your legs out as far as you can.
Modified Jumping Jack
There may be several reasons you need to modify a jumping jack to fit your needs physically, and luckily there are also several ways they can be changed!
If your shoulders are injured, or it strains them too much to bring your arms completely above your head, you can modify by only bringing them halfway up, to about shoulder length. To go even further, if you are unable to fully extend your arms then you can hold them in what I like to call the "chicken wing" position: arms bent with your hands brought into your chest, and you flap your elbows up to shoulder height and down to your sides.
If your knees or hips are the culprit, then you can do step-jacks rather than jumping. You simply step one leg out at a time to the side while pumping your arms. You will still get the benefits of the jumping jacks without putting stress on your joints.
Mountain Climbers
Trade your hiking boots for your gym shoes! These babies are some of the best full body movements out there, and the good news is that they can be done from anywhere including your home!
Mountain climbers can work your deltoids, triceps, biceps, pectorals, obliques, abs, quads, and hip abductors just to name a few!
Traditional Mountain Climbers
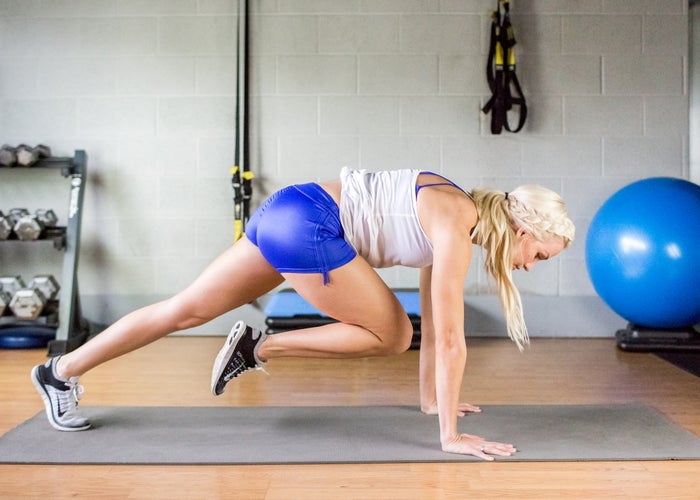
Start in a plank position, with your weight in your hands and your toes. Stagger your legs, but bringing one bent inward, placing the toes on the ground below about at hip level.
Start simultaneously switching your feet at a quick pace, bringing one forward and one back to the plank position. Be sure to keep your hips tucked down, don't let them creep upwards towards the ceiling! Also don't forget to keep that core engaged!
Modified Mountain Climbers
Since climbers can be rather strenuous, sometimes it is necessary to do a little adjusting, and that's ok! Better to be safe than sorry.
If you have trouble performing a traditional mountain climber, you can put some towels or paper plates under your feet (depending on the surface you are working out on) and instead of jumping your feet back and forth you can slide them. Trust me, these will still burn deeply into your core and get your heart rate up!
You can also modify things by just going slower. You don't necessarily have to go at a super fast pace, so go slowly and get the proper technique down first!
Abs
Working your abdominals is normally a high priority in anyone's fitness routine. I mean, who doesn't want a flat stomach?
There are many variations of abdominal workouts that you can do, basically the possibilities are endless! So it is easy to add in new routines to keep yourself from plateauing and from getting bored of just normal old crunches!
Traditional Abs
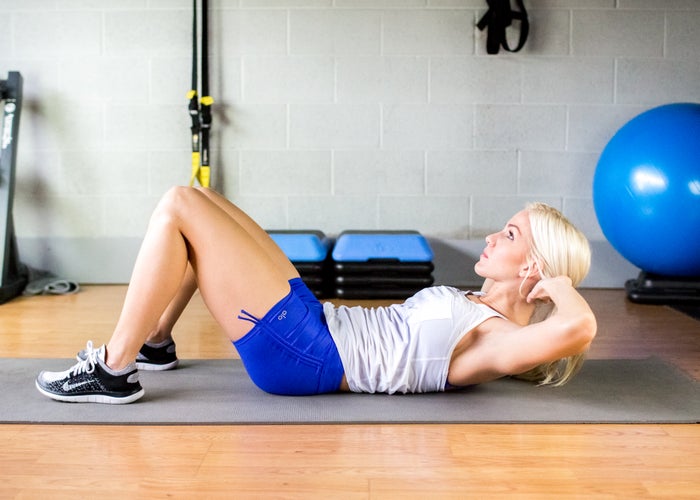
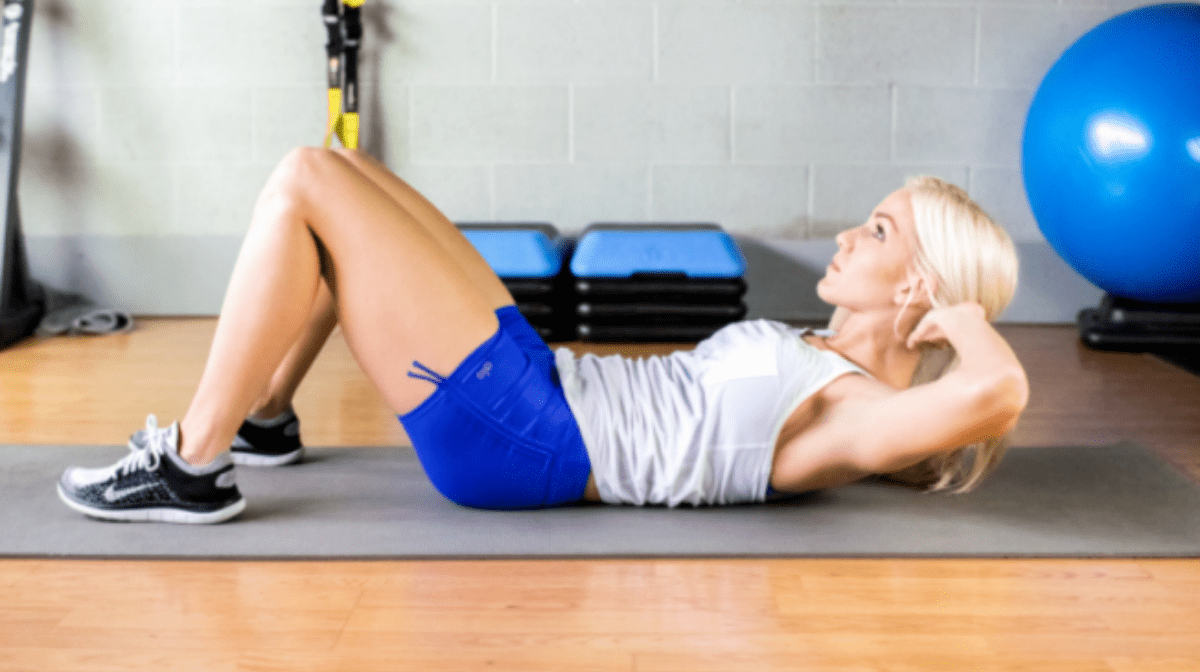
When doing basic abdominal sit-ups or crunches, you lay flat on your back with a mat underneath you to protect your spine and hips. Be sure to keep your lower back pressed into the ground, and protect it by not allowing it to arch!
Have your knees bent with your feet flat on the floor, about hip-width apart. Place your arms either behind your head, or to the side of your ears, but remember not to pull up with your arms at all; this should be an abdominal move so don't cheat yourself by pulling up with your arms!
Engage your core and breathe out as you pull yourself upwards to about 45 degrees, keeping your gaze towards the ceiling with a neutral neck. You can hold at the top for 1 isometric count, and then release, breathe in, and come back down until just before your shoulder blades hit the ground. Please don't forget to breathe while you do these, it's easy to hold your breath!
You can add variation into sit-ups as well! You can do bicycle crunches, side crunches, v-ups, and so many more! You can also add in challenging variables such as a stability or bosu ball, or add in hand weights.
Modified Abs
The main problem faced with those of you who can’t physically do a sit-up, is that it causes pain to your lower back and/or your tailbone. The solution is quite simple, and will still give you the ability to effectively work those abdominals!
To modify a sit-up, begin by making sure to stay on a stable surface like on a mat on the ground. Adding in something like a stability ball will cause unnecessary strain on your back!
Remember, you don't need to fully crunch all the way up in order to get a proper abdominal workout, so save your lower back some stress! Instead, you can fully contract your abdominals, and just pull yourself up towards the ceiling, slightly until your shoulder blades come up off the ground.
Some of you also deal with the issue of not being able to comfortably lie on the floor, or can’t even physically get down or up from down low. No problem, there is thankfully a modification solution for this too!
Start by sitting on the edge of a chair, or if you don't want to sit you can stand as well. Hold one free-weight (or even a can of food if you are working out from home) by your chest with both of your hands, your elbows should be bent up against your body. Keeping the weight against your chest, slowly bend forward while contracting your abs. Don't bend too far, just far enough that you feel your muscles working. Slowly contract back up and repeat!
Take it a step further if bending is just completely out of the question, or if you don't want to hold any weight! Sit up tall in a chair, and contract your abs fully and hold for five isometric counts, remember to breathe the whole time. Relax for five counts, and then repeat! You can do this while you are sitting at work, or sitting in your car in traffic, and you will be surprised how effective this simple move can be!
Pull-Ups
Pull-ups seem scary and intimidating to a lot of you out there. Trust me, sometimes I don't even want to do them!
These are an extremely effective exercise, working your back, shoulders, and arms! Not to mention they can really get your heart going!
Traditional Pull-Up
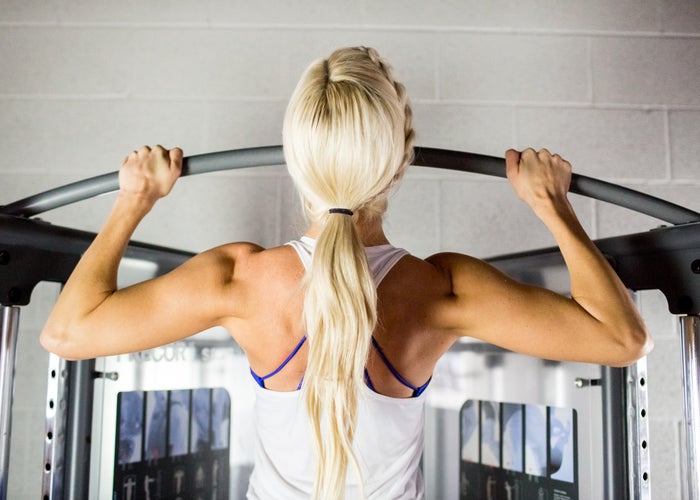
Start by holding the bar with an overhand grip, keeping your arms about shoulder-width apart. If you need help getting up to the bar to start, pull a box or chair over so you can climb up.
Hang in place to start, and then slowly pull yourself up in one controlled movement. Your chin should end up above the bar, and your chest should be about parallel with it. Lower yourself back down. Be sure to not swing your legs or arch your back, just go slow and steady!
You can do some variations on pull-ups, including changing your grip and the width of your hands.
The wider you hold your hands, the more it will work your lats which are the muscles just below your shoulder blades on your back and sides. These will make your waist look smaller, which is a win-win in my book!
If you choose to hold your hands closer, or even switch to an underhand grip, you can end up working more of your biceps and triceps.
Modified Pull-Up
Injuries in your shoulders, neck, and back can keep you from performing a pull-up. No worries though, there are definitely exercises and adjustments you can make to still get the same benefits!
You can begin by lying on your back. You might be thinking, how am I going to essentially do a pull-up lying on the ground? Well just keep reading, trust me it works!
Holding a weight above your chest with slightly bent arms, either a hand weight or a canned food item, slowly lower them down behind your head as if you are going to put the weight down. Then slowly pull your arms back up above your chest. Make sure you are engaging your lats and your pectorals!
If you want to modify a pull-up on a bar, there are a few things you can try. You can use pull-up strength bands, which attach to the bar. Place one foot into the loop, and cross your other leg around that one as you pull up. These will give you some extra stability and support, gradually building up your strength to do them on your own!
You can also modify a pull-up by doing an inverted row underneath the bar on an assisted squat rack machine.
Slide underneath the bar, with your legs hip-width apart in front of you. It is easier if you bend your knees, but try to do some reps with straight legs to challenge yourself!
Holding your hands shoulder-width apart, pull your chest up towards the bar. Hold for one isometric count, and then lower back down. Repeat!
Effectively Modifying Exercises to Fit Your Needs
Once you've made the huge step towards your weight loss and fitness goals by choosing an exercise routine, you can be road-blocked by certain moves that you are unable to do because of certain injuries or pain. You don't want to get discouraged and give up, so choose to successfully modify those troublesome moves to fit your needs.

